
How to Empty a Shark Cordless Vacuum: A Complete Maintenance Guide for 2026
You’ve just finished a satisfying cleaning session with your Shark cordless vacuum, its powerful suction having conquered dust and debris with ease. But now, the dust cup is full, and a little notification light might even be blinking, reminding you of the next essential task. Knowing how to properly empty your vacuum isn't just about disposal; it's the single most important act to maintain its peak performance and ensure it serves you well for years to come.
This guide matters because improper emptying is a leading cause of reduced suction, motor strain, and unpleasant odors in cordless vacuums. A clogged or poorly maintained dust cup forces the motor to work harder, draining the battery faster and potentially shortening the vacuum's lifespan. In this article, you will learn the step-by-step process for emptying different Shark cordless models, discover advanced cleaning techniques for the filters and cyclones, and understand how to troubleshoot common post-emptying issues. We’ll transform this routine chore from a messy guesswork into a quick, efficient, and clean ritual.
Preparation and Safety: The Essential First Steps
Before you even touch the release button, taking a moment to prepare can prevent a cloud of dust from settling back onto your freshly cleaned floors. Always empty your Shark cordless vacuum outside or over a large, lined trash can. This contains the mess and prevents allergens and fine dust from recirculating into your home's air. Ensure the vacuum is powered completely off; for most models, this means removing the battery pack. This is a critical safety step that prevents the motor from accidentally activating during the process, which could damage the vacuum or cause injury.
Next, familiarize yourself with your specific model. While the core emptying mechanism is similar across Shark's cordless lineup—like the popular Shark Vertex, Shark IZ, and Shark WandVac series—there are subtle differences. Some have a "dust ejector" lever, while others require you to press a button to release the bottom of the cup. Taking 30 seconds to locate the primary release button and any secondary latches will make the process smooth. Keep the user manual handy, or if it’s long gone, a quick online search for your model number will provide a visual guide.
Finally, gather a few simple tools: a dry microfiber cloth, a soft-bristled brush (like a clean paintbrush or the brush that sometimes comes with the vacuum), and, optionally, a pair of disposable gloves if you have allergies. Having these items ready before you start allows you to perform a thorough job without having to hunt for supplies mid-task, ensuring you can complete the entire maintenance routine in one go.
The Step-by-Step Emptying Process
With your preparation complete, you can begin the core emptying procedure. First, detach the main pod or dust cup from the vacuum body. For stick vacuums, this usually involves pressing a release button near the handle and lifting the pod away. For handheld units, the cup is often integral. Hold the vacuum over your trash can, then press the designated dust ejector button or lever. On most modern Shark cordless vacuums, this will cause the bottom lid of the dust cup to swing open, allowing the contents to fall out cleanly via gravity. Avoid shaking or banging the cup vigorously, as this can force fine dust deeper into the filter system.
After the bulk debris is out, you’ll often find dust and hair clinging to the sides and the interior rubber seals. Use your soft-bristled brush to gently dislodge this material. Pay special attention to the crevices around the lid hinge and the seal at the top of the cup where it meets the cyclonic assembly. For stubborn hair or string wrapped around the agitator bar in the floor nozzle, you may need to detach the nozzle and use scissors to carefully cut and remove the debris. This step is crucial for maintaining optimal airflow.
Once the cup is visually empty, take your dry microfiber cloth and wipe down the interior. Do not use water or cleaning agents on the plastic dust cup at this stage. The goal is to remove the fine dust layer that brushing might have missed. Before reassembling, give the cup a quick tap against the inside of the trash can to dislodge any last particles from the cloth. A clean cup ensures the lid seals properly and that the full indicator, if your model has one, will reset accurately.
Beyond the Bin: Cleaning Filters and Cyclones
Reassembly and Post-Maintenance Check
After all components are completely dry, reassembly is the next critical phase. Start by ensuring the empty dust cup is securely clicked back into its closed position. You should hear a definitive click, and the lid should sit flush with no gaps. Next, insert the fully dry filters back into their correct compartments, making sure they are seated flat and the compartments are locked shut. A misaligned or pinched filter will allow unfiltered dust to reach the motor, causing damage.
Once the pod is reassembled, reattach it to the vacuum body, again listening for a secure click. Insert the battery and power on the vacuum. Let it run for 10-15 seconds in an upright position to ensure normal operating sound and suction. Listen for any unusual whistling or straining noises, which could indicate a poor seal or a forgotten component. Check that any "bin full" indicator lights have reset. This quick test confirms a successful maintenance session.
Finally, store your vacuum properly. If it has a wall mount, use it. Storing the vacuum upright on its mount takes pressure off the internal components and prevents accidental damage. Avoid storing it in damp areas like basements or garages with high humidity, as this can promote corrosion and mold growth inside the filters. Proper storage is the final step in a comprehensive care routine that extends the life of your investment.
Troubleshooting Common Post-Emptying Issues
Even with careful maintenance, you might encounter issues after emptying. One common problem is a loss of suction immediately after reassembly. The most likely culprit is a damp filter. Immediately power off the vacuum, remove the filters, and confirm they are bone dry. If they feel cool or damp at all, give them more time to air dry. Another cause could be a clog in the airway between the dust cup and the filter; use a long, flexible object like a pipe cleaner to gently clear any blockages.
Another frequent issue is the "bin full" indicator remaining on after you've emptied the cup. First, double-check that all debris, especially fine dust, has been cleared from the sensor window (if your model has one) inside the dust cup. Wipe it with a dry cloth. Also, ensure the cup is clicked completely shut and seated correctly on the vacuum body. Sometimes, the mechanism that triggers the sensor needs to be reset by disconnecting and reconnecting the battery.
If an unpleasant odor persists after cleaning, it often points to a dirty filter or debris trapped in the cyclones or brush roll. Wash the filters again, ensuring they are 100% dry. Inspect the brush roll for wrapped hair and organic material, and clean it thoroughly. For a deeper clean, you can wipe the interior of the dry dust cup and cyclonic chamber with a cloth lightly dampened with a mixture of water and white vinegar, then dry completely before use. Persistent odors may indicate mold, requiring a more detailed inspection.
Key Takeaways
- ✓ Always empty the dust cup outside or over a lined trash can and power off the vacuum completely before starting the process.
- ✓ Regular cleaning of both the pre-motor and post-motor filters with water (and allowing 24+ hours for complete drying) is essential for maintaining suction and motor health.
- ✓ Use a soft brush to clean the cyclonic fins and a dry cloth for the dust cup interior; avoid using water or cleaners on these plastic parts.
- ✓ Ensure all components, especially filters, are completely dry before reassembly to prevent mold, odors, and motor damage.
- ✓ Perform a quick operational check after reassembly to verify normal suction and sound, and store the vacuum on its wall mount in a dry place.
Frequently Asked Questions
How often should I empty my Shark cordless vacuum?
You should empty the dust cup after every major cleaning session or whenever it reaches the "full" line. For optimal performance, never let it overfill. Regular emptying prevents clogs and maintains strong suction.
Can I wash the entire dust cup assembly with water?
No. The main plastic dust cup and cyclonic top can be wiped with a dry or slightly damp cloth, but should not be submerged or run under water. Only the specific, removable foam and felt/HEPA filters are designed to be rinsed with water.
Why is my vacuum still losing suction after I've emptied and cleaned it?
The most common reason is a damp filter. Filters must be air-dried for a full 24 hours with no moisture remaining. Other causes include a clog in the airways, a full brush roll, or an improperly seated dust cup that's breaking the seal.
Do I need to replace the filters, or is cleaning enough?
Cleaning is sufficient for a long time, but filters are wear items. Shark generally recommends replacing the post-motor filter every 6-12 months and the pre-motor filter as needed, depending on use. If cleaning no longer restores airflow or odors persist, it's time for a replacement.
Is it safe to use my vacuum without the filters installed?
Absolutely not. Running a Shark vacuum without its filters will allow dust and debris to enter the motor, causing immediate and irreversible damage. Always ensure both filters are correctly installed, clean, and dry before operating the vacuum.
Conclusion
Mastering the art of emptying and maintaining your Shark cordless vacuum is a simple yet profoundly impactful skill. By following the detailed steps outlined—from safe preparation and proper emptying to diligent filter care and thorough reassembly—you directly contribute to the longevity, efficiency, and reliability of your cleaning tool. This routine transforms maintenance from a chore into a quick, systematic process that ensures your vacuum is always ready to perform at its best, saving you time and money on potential repairs or premature replacement.
Take the knowledge from this guide and apply it during your next cleaning session. Locate your model's manual online if needed, assemble your soft brush and microfiber cloth, and give your vacuum the care it deserves. By investing a few extra minutes in proper maintenance, you protect your larger investment in the appliance itself, guaranteeing powerful, cord-free cleaning for your home well into the future. Your floors—and your vacuum—will thank you.

Liam Parker covers robot vacuums, cordless vacuums, and smart home cleaning technology, focusing on practical comparisons, features, performance, and buying advice.
Related posts
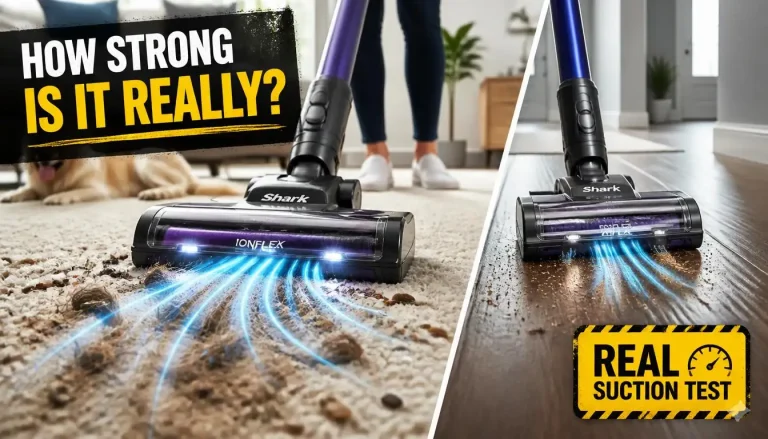 Shark IonFlex Suction Power: How Strong Is It Really?
If you are wondering how much suction does the shark ionflex cordless vacuum have, the answer depends entirely on which power mode you select. In standard…
 5 Best Cordless Handheld Vacuum for Pet Hair 2026
Every dog owner knows the battle of fur on furniture and car seats. Finding the right best cordless handheld vacuum for pet hair comes down to…
 5 Best Cordless Hard Floor Cleaner 2026
Keeping hard floors clean without the hassle of cords is something many homeowners now expect from their daily routine. A best cordless hard floor cleaner…